Introduction
Painting a fence with a brush can take a while, especially when you have a lot of timber to cover. A roller can speed things up, but it may leave a textured finish or miss some of the uneven areas. A fence paint sprayer offers another option, helping you cover larger sections more quickly and get a more even finish when used properly.
A fence paint sprayer solves most of that. It isn’t magic, though, and it doesn’t suit every fence. This guide covers why spraying gives a smoother result, how to do it properly, where it goes wrong, and when it’s smarter to hand the job to a painter.
Why spraying gives a smoother finish
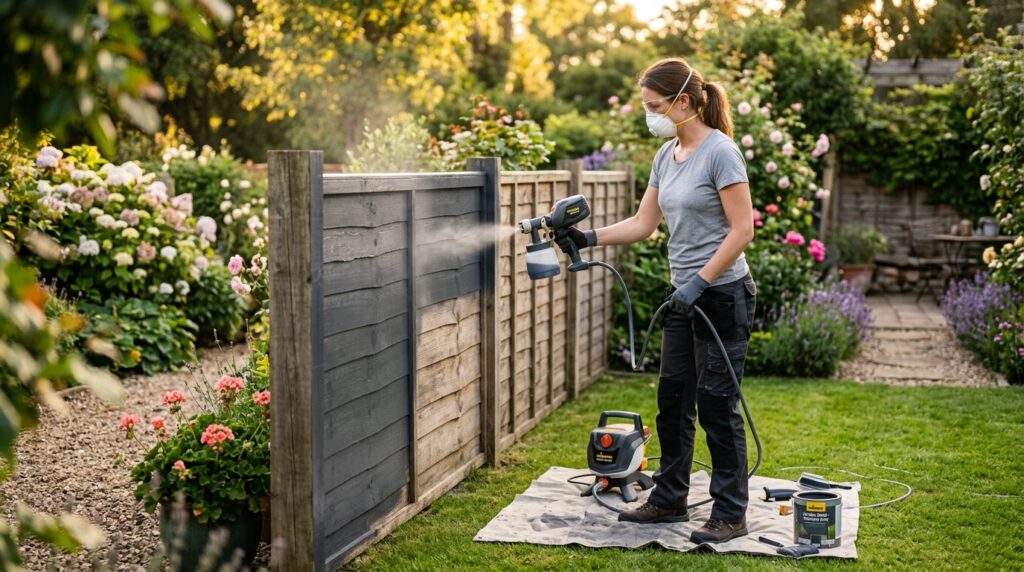
A sprayer breaks paint into a fine mist and lays it down as an even wet layer. There are no bristle lines and no roller texture. The mist also reaches the edges of palings, the gaps between boards and the grooves in rough-sawn timber, all places a brush has to be worked into by hand.
Even application means even drying, and that matters more than most people expect. Patchy thickness is what causes uneven sheen, and on a long fence in full sun it’s the first thing you notice.
Speed helps too. Because you keep a wet edge as you move along, you avoid the lap marks that show up when one section dries before you reach the next. Fences are large, repetitive surfaces, which is why many professionals spray them: consistent, thin coats look better than a patchwork of brushed sections.
Airless or HVLP: which suits a fence?
Two types come up most often.
Airless sprayers push paint through a small tip at high pressure. They’re fast, cope with thicker paint, and are the usual choice for long runs. The trade-off is overspray, because that fine mist travels.
HVLP (high volume, low pressure) uses a lot of air at gentle pressure. The finish is finer and there’s less overspray, so it suits gates, lattice and detail work. It’s slower, and thicker paints often need thinning before they spray well.
For a standard timber or Colorbond fence, airless is usually the better fit. For a small, fiddly job, HVLP is easier to control.
Are electric models good enough?
Most homeowners asking about an electric fence paint sprayer want to know if a plug-in unit has enough power. For short fences and gates, usually yes. Electric units are simple to set up and run, and smaller ones generally cost less than larger petrol or compressor-driven rigs.
On a very long fence, or with thick paint, smaller units can struggle. Check the maximum paint thickness, hose length and tip sizes on the spec sheet before you buy. Cordless models are convenient, but the battery can run out halfway along a big job.
How to choose the best fence paint sprayer
There’s no single winner for every fence, so the best fence paint sprayer is the one that matches your job. Ask yourself:
- How long is the fence, and will you use the machine again?
- What paint are you using? Water-based acrylic sprays differently from oil-based or thicker coatings.
- What tip size and pressure does the paint’s data sheet recommend?
- How easy is it to clean, and are spare tips and filters easy to get?
- Is there a local warranty or support?
Here’s how the main options compare:
| Method | Speed | Finish | Overspray | Best for |
| Brush | Slow | Good, but shows strokes | None | Touch-ups, rough timber, tight spots |
| Roller | Medium | Even, slightly textured | Low | Flat panels, rendered fences |
| HVLP | Medium | Very fine | Low to medium | Gates, lattice, small fences |
| Airless | Fast | Smooth and uniform | High | Long fence runs, big jobs |
If you only have one short fence to paint, hiring a unit or a painter often costs less than buying.
How much paint and time should you allow?
Spraying is quick, but the job around it isn’t.Most of your time goes into preparation, masking, drying and cleanup, so plan for the whole process rather than the spraying time alone. A small fence may take much less time, while a long or weathered fence can take several days.
Paint quantity is harder to predict. Coverage depends on the product, the sprayer and the surface, so always start with the coverage figure on the paint’s data sheet. Then add a buffer. Rough, weathered or bare timber soaks up more paint than smooth boards, and some paint is lost to the air when spraying. Buying a little extra is cheaper than running short halfway along the fence and struggling to match the batch.
How to spray paint a fence, step by step
- Proper preparation is an important part of fence painting, especially when the existing surface is dirty, weathered or peeling.
- Mask everything you want to keep clean. That means gardens, paths, neighbouring surfaces and cars. Overspray is a common problem with DIY spraying.
- Test first. Before you spray the whole run, try the paint on a scrap paling or a hidden section. Follow the manufacturer’s directions on thinning and tip size. Too thick and it spits. Too thin and it runs.
- As a general starting point, keep the gun around 25 to 30 cm from the surface and keep it square to the fence. Adjust the distance according to the sprayer and coating manufacturer’s instructions.
- Start moving before you pull the trigger, and release the trigger before you stop.
- Apply the required number of thin coats. Avoid one heavy coat that can sag or run, and follow the paint manufacturer’s recommended coverage and recoat time.
- Back-brush where needed. On bare or very rough timber, many painters lightly brush over the wet coat so the paint bites into the grain.
- Stay safe. Wear a respirator suited to the paint, eye protection and gloves. Never put a finger or hand in front of an airless tip, because the pressure can inject paint under the skin, and that needs urgent medical attention. Keep solvent-based paints away from ignition sources
Common mistakes that ruin a sprayed finish

Most problems with a sprayed fence come down to a handful of habits, and all of them are avoidable.
- Spraying too close. It looks efficient, but it dumps too much paint in one spot and causes runs and drips.
- Swinging the gun in an arc. Pivoting your wrist means the edges of each pass get less paint than the middle. Keep the gun parallel to the fence and move your whole arm.
- Stopping mid-pass. Pausing while the trigger is held leaves a heavy patch. Trigger off, then stop.
- Skipping the test. A quick trial on a spare paling shows you straight away if the paint is too thick or the tip is wrong.
- Rushing the second coat. Recoating before the first has dried enough can lift the paint or trap moisture. Follow the recoat time on the tin.
The downsides nobody mentions
A sprayer isn’t always the best answer, and it’s worth being honest about why.
- Overspray. Even careful people underestimate how far the mist drifts, and wind makes it worse.
- Set-up time. Masking and preparing can take longer than the spraying itself on a small job.
- Cleaning. Flushing an airless machine properly is fiddly. Skip it and your next job starts with a blocked tip.
- Practice. A good finish takes a little skill, and mistakes show on a front fence.
- Paint use. Some paint ends up in the air rather than on the fence, so you may use more than you would with a roller.
For a short back fence or a couple of gates, a good roller and brush might be quicker and cheaper.
Cleaning your sprayer after the job
Cleaning is the step people are most tempted to rush, and it decides whether the machine works next time. Paint left to dry inside the hose, filter or tip is hard to remove and can ruin the equipment.
Flush the sprayer as soon as you finish, using water for water-based paint or the recommended solvent for oil-based products. Run the cleaner through until it comes out clear, then remove and wash the tip and filter separately. Follow the manufacturer’s manual for your model, and dispose of paint and solvent responsibly rather than tipping it down a drain or onto the ground. Your local council can tell you where to take leftovers.
Spraying in Melbourne conditions
Wind is the big one. A southerly change can arrive mid-job and carry mist onto a neighbour’s washing or car. If it’s gusty, wait a day, and never spray on a windy afternoon just because you’ve already set up.
Heat matters too. On a very hot day, paint can dry almost as it leaves the gun, leaving a rough, dusty finish instead of a smooth one. Early morning or shade works better in summer. Avoid days when rain is likely, or when overnight dew could land on a tacky coat.
Fence material changes the approach as well. Timber usually needs the right primer, paint or stain, while repainting colorbond steel requires careful surface preparation and a coating system suitable for the existing finish. Check the paint manufacturer’s instructions and current guidance before you start.
DIY or hire a painter?
Spraying it yourself makes sense if:
- the fence is simple, straight and not too long
- you have plenty of clear space to control overspray
- you’re comfortable setting up, testing and cleaning the equipment
- a “very good” finish is enough
Hire a professional if:
- the fence faces the street or is long and highly visible
- it’s close to neighbours, cars or gardens
- the old paint is peeling, or the timber or metal needs repair or rust treatment
- you’d rather not buy a sprayer for a single job
- you want it done in a day or two, with a written warranty
A professional crew brings the right gear, the right tips and pressure, and the experience to read a fence and adjust as they go.
FAQs
Is a fence paint sprayer better than a brush?
For most fences, yes, for speed and evenness. A brush still wins on small areas and for working paint into rough timber.
What is the best fence paint sprayer for a beginner?
Usually an electric unit with adjustable pressure, since it’s simple to use and suits short to medium fences. For a long fence, an airless machine saves a lot of time.
Can you spray a colorbond fence?
It can be repainted in some circumstances, but the original colorbond finish is factory-applied and repainting can affect durability and warranty conditions. Check BlueScope’s current guidance before proceeding.
How long does a sprayed coat last?
It depends on the paint, the prep and how much sun and weather the fence gets. Good prep and quality paint matter more than the application method.
Will overspray damage my neighbour’s property?
It can. That’s why masking, wind checks and the right equipment matter, and why it’s polite to let neighbours know beforehand.
Conclusion
A good fence finish comes down to proper preparation, the right paint and careful spraying. If you do not want to spend your weekend setting up equipment, masking everything around the fence and cleaning the sprayer afterwards, getting help from a professional can make the job much easier.
Sam Simon Painters can take care of the preparation, spraying and final coat, helping you get a clean, even finish without the hassle of doing it yourself. Contact the team to discuss your fence and arrange a free quote.