
You finish the last coat and the ceiling looks fine. Then the afternoon sun comes through the window and shows every roller mark, a patchy section near the cornice and a faint stain that has come back through the paint. It is one of the most common ceiling painting mistakes, and it is usually avoidable.
Ceilings are harder to paint than walls. You work overhead, light hits the surface at a low angle, and a large flat area shows every flaw. Most problems start well before the paint goes on, with the preparation, the product choice, or the way the paint is applied. This guide covers seven common ceiling painting mistakes and how to avoid each one, so you know how to paint a ceiling with a smooth, even finish.
1. Skipping Proper Ceiling Preparation
Dust, cobwebs, kitchen grease and smoke film settle on most ceilings, even when they look clean from the floor. Paint struggles to grip these surfaces, so it can peel, crawl or dry with a blotchy finish. Skipping preparation causes more ceiling painting mistakes than anything else.
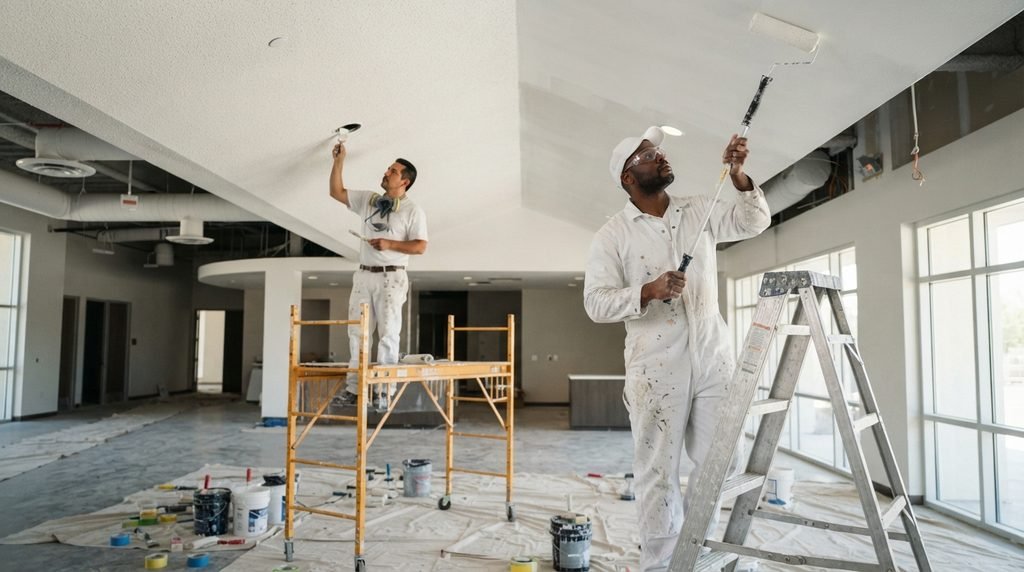
On a real job, we start by inspecting the ceiling with a strong light held at an angle. This shows cracks, hollow patches, flaking paint and old repairs that are hard to see otherwise. Next we protect the room. Furniture is moved or covered, floors are sheeted, and light fittings and cornices are masked where needed. Then we clean the surface, repair defects, sand the repairs smooth and prime any bare or patched areas.
Each step has a reason:
- Cleaning removes what stops paint from bonding.
- Sanding feathers the edge of a repair so it does not show as a ridge.
- Priming seals patched plaster, which otherwise soaks up paint at a different rate and leaves dull spots.
If you are painting the ceiling yourself, allow more time for ceiling preparation than for painting. It is also where our team spends the most care, because the final finish depends on it.
2. Choosing the Wrong Ceiling Paint or Roller
A ceiling is not the same as a wall, so the paint should not be either. Ceiling paint is usually made as a flat finish. This reduces glare and helps hide small surface imperfections. A paint with sheen reflects light, so it can highlight every roller mark and uneven patch. A thin, low-quality paint may also need extra coats and still look patchy.
The ceiling paint roller matters as much as the paint. Nap is the length of the pile on the roller cover. A short nap holds less paint and suits smooth plaster. A longer nap holds more paint and suits textured surfaces. A nap that is too long on a smooth ceiling can leave a stippled texture. A nap that is too short on a textured ceiling can miss the low points and leave bare spots.
Check the paint manufacturer’s technical data sheet before you buy. It lists the recommended roller type, number of coats, coverage and recoating time. Matching the paint and roller to the surface avoids some of the costliest ceiling painting mistakes. See the section on choosing ceiling paint below for room-by-room guidance.
3. Applying Paint Unevenly and Creating Roller Marks
Roller and lap marks are the most visible of all ceiling painting mistakes. They usually come from losing the wet edge, the border of freshly applied paint that is still workable. If you return after the paint has started to set, the overlap dries as a darker or shinier band. An overloaded roller leaves ridges, and a dry one leaves thin patches that show the old colour through.
To keep a wet edge:
- Cut in the edges with a brush, then roll straight away while the cut-in paint is still wet.
- Work in manageable sections without long breaks, using an extension pole for steady pressure.
- Finish each section with light, even strokes in one direction.
A portable work light angled across the ceiling shows missed spots while the paint is still wet. On larger ceilings, two people working together can keep the wet edge going much more easily.
4. Ignoring Stains, Peeling Paint and Cracks
Fresh ceiling paint will not hide everything underneath. Water stains, smoke marks and tannin stains often show through standard paint after it dries. These usually need a suitable stain-blocking primer first. The right primer depends on the type of stain, so check the product’s data sheet before you buy.
Peeling paint is a similar issue. New paint over loose paint will only be as strong as the layer below it. Scrape back flaking areas to a firm edge, sand them smooth and spot prime before the new coat goes on.
A fine hairline crack can often be filled with a flexible filler, sanded and primed. Cracks along plasterboard joins or cornices can come back if the cause is movement in the building. Painting over any crack only hides it for a short time.
Find out why the stain or crack is there before you repair it. If a stain keeps returning, a crack keeps reopening or the plaster looks damaged, the problem is not cosmetic. In those cases, we recommend a professional assessment before any paint goes on, so the problem does not turn into one of those repeat ceiling painting mistakes.
5. Painting Over Damp or Poorly Prepared Surfaces
Paint cannot fix moisture. If plaster is damp, the new coat can blister, peel or stain again within a short time. Damp ceilings are common in bathrooms, laundries and rooms below a bathroom, a roof or a plumbing run. Warning signs include brown rings, bubbling paint, a musty smell, soft or sagging plaster and dark spots of mould.
If you suspect a leak, deal with the source first. That may mean a plumber, a roof repair or better ventilation. Then let the ceiling dry fully, repair any damaged plaster, treat mould with a suitable product and only then repaint. Painting over mould or a live leak is one of the costliest ceiling painting mistakes, because it wastes time and money.
Other surfaces need care too. A glossy old coat should be lightly sanded so the new paint can grip. A chalky surface should be cleaned and sealed. New plaster needs the correct sealer or primer. Where the cause of the damp is unclear, a professional assessment is the safest step.
6. Using the Wrong Technique or Working in Unsuitable Conditions
Rolling suits most occupied homes because it gives good control and little overspray. Spraying can give a very even finish on large, open or empty spaces, but it needs careful masking and a skilled operator.
Conditions matter just as much as technique, and many ceiling painting mistakes in this area come from picking the wrong method or the wrong day. Hot, dry or windy weather makes paint set faster, which shortens the wet edge and makes lap marks more likely. Open windows can create draughts across a wet ceiling, while cold or humid air slows drying and can affect how the film forms. Aim for gentle ventilation rather than a strong draught, good lighting, and the temperature and humidity range on the data sheet.
7. Rushing Drying Times and Skipping the Final Inspection
Paint that feels dry to the touch is not always ready for another coat. Recoating too early can cause drag, lifting or an uneven sheen. Drying and recoating times vary with the product, the temperature, humidity and airflow, so follow the technical data sheet rather than guessing.
Once the final coat is dry, inspect the ceiling properly:
- Turn off the lights and check the surface using a torch or work light held at a low angle.
- Check again in daylight, as natural light often shows different flaws.
- Look for missed edges, thin patches, drips and roller marks.
- Check walls, floors and fittings for paint splashes.
Small touch-ups are much easier when you spot them early. Remove masking tape carefully so you do not lift fresh paint. Skipping the final check is one of the easiest ceiling painting mistakes to avoid: it takes only a few minutes and often makes the difference between an acceptable job and a good one.
How to Choose Ceiling Paint

There is no single best paint for ceilings, and choosing the wrong product is behind many ceiling painting mistakes. The right ceiling paint depends on the room, the existing surface and how the ceiling is used. We use Dulux and Haymes products and match the system to the surface rather than using one paint everywhere. Planning a wider project? Our interior painting guide covers the rest of the room.
| Ceiling type | What to look for | Watch out for |
| Bedrooms, living rooms, hallways | Quality flat ceiling paint to cut glare and hide minor flaws | Sheen paints that show roller marks |
| Kitchens | A flat paint that tolerates grease and cleaning | Painting over grease without cleaning first |
| Bathrooms and laundries | A product made for damp areas, usually mould resistant | Ordinary ceiling paint in a poorly ventilated room; check the exhaust fan works |
| Textured ceilings | A thicker roller nap so paint reaches the low points | Sanding or scraping older ceilings before asbestos is ruled out |
White is the usual colour, though some homeowners choose a soft tint. For bathroom ceiling paint, choose a mould resistant product made for damp areas, and for textured ceiling paint, pair it with a thicker roller nap. Some older Australian ceiling materials can contain asbestos. If your home is older and you are unsure, do not sand or scrape the ceiling. Have the material tested by a qualified professional first.
For most standard rooms, a ceiling paint roller gives the best control. Ceiling spray paint suits larger areas but needs thorough masking, so see our spray painting tips before you decide.
What Affects the Cost of Ceiling Painting?
Every ceiling is different, so we do not quote fixed prices in articles. Fixing ceiling painting mistakes later usually costs more than preparing the first time properly. For ceilings, the main cost drivers are:
- Ceiling size and height, which affect access and equipment.
- Surface condition, including any cracks, patches or flaking paint to repair.
- Stains or damp that need treating before painting.
- Textured surfaces, which take more paint and time than smooth plaster.
- The number of coats and the paint system required.
A written quote that lists the preparation and the number of coats is easier to compare than a price alone. For how to compare quotes, see how to choose the best interior painting services.
Frequently Asked Questions About Ceiling Painting
What are the most common ceiling painting mistakes?
The most common ceiling painting mistakes are skipped preparation, the wrong paint or roller, uneven application, ignored stains, damp surfaces, poor conditions and rushed drying.
How do you paint a ceiling without leaving roller marks?
Keep a wet edge, load the roller evenly and work in small sections without long pauses. Use a roller nap that suits the surface, and check your work with a light held at an angle.
What is the best paint for ceilings?
It depends on the room and the surface. Most living areas suit a quality flat ceiling paint, while bathrooms and kitchens may need a product made for moisture or cleaning. Always check the data sheet.
Can you paint a bathroom ceiling with ordinary ceiling paint?
It is not usually the best choice. Bathrooms have steam and condensation, so a paint suited to damp areas is safer. Good ventilation also matters.
Does a ceiling need primer before painting?
Not always. A clean ceiling in good condition can sometimes be repainted directly. Stains usually need a stain-blocking primer, and bare plaster, repairs and glossy surfaces need a suitable primer or sealer first.
Is it better to roll or spray a ceiling?
Rolling suits most occupied homes and gives good control. Spraying can work well in large or empty spaces, but it needs careful masking and the right skills. Our spray painting guide goes into detail.
How long should ceiling paint take to dry?
Drying and recoating times vary by product, temperature and humidity. Follow the technical data sheet, and remember that touch dry does not always mean ready for another coat.
How do you avoid ceiling painting mistakes?
You avoid most ceiling painting mistakes with thorough preparation, the right paint and roller, a steady wet edge and enough drying time. Inspect the finished ceiling at a low angle before you remove the masking.
Talk to Us About Your Ceiling
Good ceiling painting comes down to honest preparation, the right products, steady technique and enough time to let each coat dry. If your ceiling has stains, cracks, or peeling paint, or you are not sure what it needs, we are happy to take a look and help you avoid costly ceiling painting mistakes. Contact Sam Simon Painters for advice or a free quote for your Melbourne home.